 Pin It
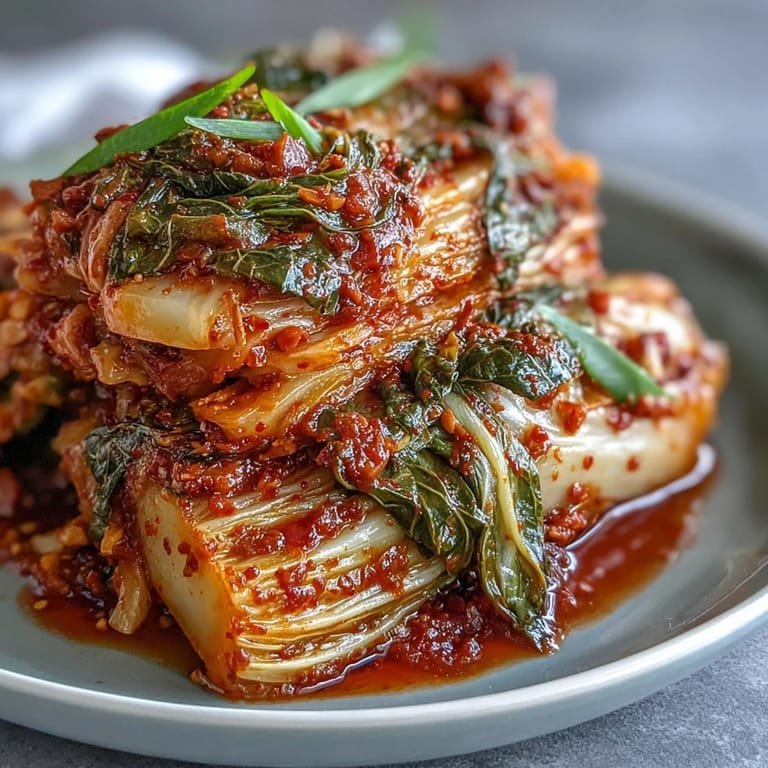
 My kitchen smelled like a Korean grandmother's home the first time I decided to make kimchi from scratch—not because I'd actually been there, but because the moment I minced that garlic and ginger, something clicked into place. The spice paste bubbling on the stove felt like I was unlocking a secret that had been hiding in plain sight. Two weeks later, cracking open that first jar to hear the gentle hiss of fermentation was the moment I understood why kimchi isn't just food; it's alive, evolving, becoming more itself every single day.
I'll never forget serving homemade kimchi to my friend who grew up eating it every meal in Seoul—she took one bite and got quiet in that way that means something just landed right. She asked if I'd use real fish sauce, and when I said yes, she smiled like I'd passed some unspoken test. That moment made the two-hour brining, the careful massaging, and the daily jar-burping feel like it was all worth it.
Ingredients
- 1 large napa cabbage (about 1.2 kg / 2.5 lbs): The backbone of your kimchi—look for one that feels heavy and firm, with pale green outer leaves; they soften beautifully during brining.
- 1 medium daikon radish (about 200 g), julienned: This adds a clean, almost peppery crunch that keeps your kimchi textured and interesting even after weeks of fermentation.
- 4 scallions, sliced: They bring a whisper of onion flavor that rounds out the spice without overwhelming the heat.
- 1 medium carrot, julienned (optional): A touch of natural sweetness that balances the intensity if you ever find yourself making kimchi too aggressively spiced.
- 80 g (1/3 cup) coarse sea salt: Don't skip the coarse salt—fine salt dissolves differently and can throw off your brine ratio; this size granule is what lets you taste and adjust as you go.
- 1.5 liters (about 6 cups) cold water: Cold water matters because you want the vegetables to stay crisp during brining, not get soft.
- 6 cloves garlic, minced: Use fresh garlic here—jarred won't ferment the same way, and you need the raw punch that gets mellowed by time.
- 1 thumb-sized piece fresh ginger, peeled and minced: Fresh ginger gives you that warming note that makes kimchi feel both comforting and exciting at once.
- 1 small onion, roughly chopped: This goes into the paste where it'll be blended smooth, adding a layer of umami depth.
- 3 tbsp fish sauce (or soy sauce for vegan): Fish sauce is non-negotiable for depth if you eat it; if you're vegan, good soy sauce works but the flavor profile shifts slightly—embrace it.
- 1 tbsp sugar: Just enough to balance the salt and heat without making your kimchi sweet; don't be tempted to add more.
- 3–5 tbsp Korean red chili flakes (gochugaru), to taste: This is where you find your spice level; start at three and work up, remembering that fermentation can intensify heat slightly.
- 2 tbsp rice flour: This thickens the paste and helps it cling to the vegetables, plus it adds a subtle sweetness that fermentation will develop over time.
- 150 ml (2/3 cup) water: Use filtered water if you have it—chlorine can interfere with fermentation.
Tired of Takeout? 🥡
Get 10 meals you can make faster than delivery arrives. Seriously.
One email. No spam. Unsubscribe anytime.
Instructions
- Prepare your cabbage:
- Cut the napa cabbage lengthwise into quarters, then chop into 2-inch pieces—you want them chunky enough to hold texture but small enough that the brine penetrates every leaf. Keep your knife sharp and your cutting board steady.
- Make the brine:
- Dissolve 80 g sea salt in 1.5 liters cold water in a large non-reactive bowl (glass or ceramic, never metal), stirring until the salt disappears completely. Add your cabbage pieces and toss to coat, then place a plate and weight on top to keep everything submerged—those pieces that float above the brine will oxidize and turn brown.
- Begin the salt cure:
- Let the cabbage sit for 2 hours, tossing every 30 minutes to ensure even salting; you'll watch the leaves wilt and soften as the salt draws out their water. This is the foundation of everything—don't rush it.
- Rinse thoroughly:
- After 2 hours, drain the cabbage in a colander and rinse it under cold running water 2–3 times, squeezing gently to remove excess salt—taste a piece to make sure it's not overly salty. Drain well in the colander; excess water will dilute your spice paste.
- Build your spice paste:
- Whisk 2 tbsp rice flour with 150 ml water in a small saucepan over medium heat, stirring constantly until it thickens to a porridge-like consistency, about 1–2 minutes. This gelatinous paste is the glue that holds your kimchi together and feeds the fermentation.
- Cool and blend:
- Let the rice paste cool to room temperature, then combine it in a blender with minced garlic, minced ginger, chopped onion, fish sauce, and sugar; blend until completely smooth. Stir in your gochugaru gradually, tasting as you go—you can always add more heat, but you can't take it out.
- Coat the vegetables:
- In a large bowl, combine your drained cabbage, julienned daikon radish, sliced scallions, and carrot if using; add the spice paste and pull on kitchen gloves—this is essential, not optional, because the chili will burn your hands. Massage everything together thoroughly, making sure every piece gets coated with that red paste and the flavors start melding.
- Pack and store:
- Pack the kimchi tightly into clean glass jars or a fermentation crock, pressing down firmly with your hand or the back of a spoon to eliminate air pockets and encourage liquid to rise up and submerge the vegetables. Leave at least 1 inch of headspace at the top—fermentation produces gas and you need room for it to expand.
- Begin fermentation:
- Seal the jars and leave them at room temperature away from direct sunlight for 1–2 days, opening them once daily to release the pressure that builds up from fermentation—you'll hear a satisfying hiss. This burping prevents explosions and lets you monitor progress.
- Taste and refrigerate:
- After 48 hours, open a jar and taste—if it's sour and tangy to your liking, move it to the refrigerator where fermentation slows dramatically. If you prefer it more funky and developed, let it sit another few days; kimchi will continue evolving in the fridge for weeks.
 Pin It
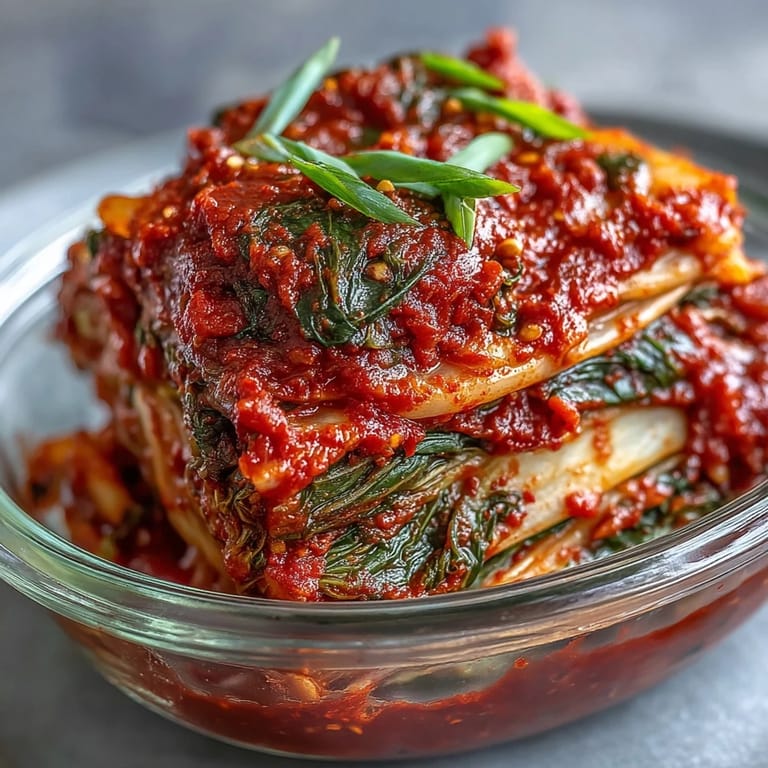
 One winter morning, I found myself eating kimchi straight from the jar at 6 a.m. before anyone else was awake, and I realized that somewhere between day two and day five of fermentation, I'd stopped thinking of it as something I made and started thinking of it as something alive in my kitchen that I was taking care of. That shift—from cooking to caretaking—is when kimchi stops being a recipe and becomes a practice.
The Fermentation Window
There's no single perfect moment when kimchi is done—it's a spectrum, not a finish line. Some people love it after three days when it still has brightness and crunch; others wait a full week for that deeper, almost funky funk that makes it taste like history. I've found that tasting it daily around day two gives you a map of how your particular jar is evolving, and you can decide where it tastes most like itself to you. The room temperature, the vegetables you used, even the humidity in your kitchen all play tiny roles in the timeline.
Temperature and Climate Matter
Fermentation speeds up or slows down based on what's happening outside your kitchen—warm months mean faster fermentation, sometimes ready in 24 hours, while winter might stretch it to four or five days. I used to think I was doing something wrong until I realized that winter batches just needed patience and an extra day or two on the counter. The cold won't hurt your kimchi; it just means the microbes are moving slower, which honestly gives you a wider window for tasting and deciding when to refrigerate.
Spice Level and Customization
The amount of gochugaru listed here is a starting point, not a law—your heat tolerance and your audience matter more than any recipe rule. I've learned that if you're cooking for a mixed group, you can always add more chili to your personal bowl, but you can't take it out of the whole batch. Some of my best batches came from the moment I stopped following the recipe exactly and started listening to what I was feeling in that moment—a friend visiting meant I held back on heat, a grey week meant I leaned hard into the spice.
- For milder kimchi, reduce gochugaru to 2-3 tbsp and consider adding a teaspoon of grated apple or pear to the paste for natural sweetness that mellows heat.
- If you miscalculate and make it too spicy, you can't undo it, but you can serve it in smaller portions mixed with milder sides or rice.
- Keep in mind that fermentation can intensify heat slightly, so what tastes moderately spicy on day two might have more bite by day five.
 Pin It
 Making kimchi changed how I think about time in the kitchen—it taught me that some of the best things can't be rushed, and that the best flavor comes from paying attention to something as it transforms. Every time you open that jar, you're part of the story.
Recipe FAQs
- → How long does kimchi fermentation take?
Initial fermentation requires 1-2 days at room temperature. After burping jars daily and tasting for desired tanginess, transfer to refrigeration. The kimchi continues fermenting slowly, developing deeper flavors over several weeks.
- → Can I make kimchi less spicy?
Reduce the amount of gochugaru (Korean red chili flakes) to 2-3 tablespoons. You can also add grated apple or pear to the spice paste for natural sweetness that balances heat without sacrificing traditional flavor.
- → What's the purpose of salting cabbage before making kimchi?
Salting draws excess moisture from the cabbage leaves, creating the proper texture for fermentation. This process also helps develop that signature crunch and prevents the kimchi from becoming mushy during the fermentation period.
- → Why do I need to burp the kimchi jars?
Fermentation produces carbon dioxide gas. Burping releases this pressure buildup, preventing jars from cracking or exploding. Simply open the lid briefly once daily to let gas escape, then reseal tightly.
- → How can I tell when kimchi is ready to refrigerate?
Taste your kimchi after 48 hours of room-temperature fermentation. When it reaches your preferred level of sourness and tanginess, transfer it to the refrigerator. The flavor will continue mellowing and deepening over time.
- → What makes kimchi bubble during fermentation?
Bubbling indicates active fermentation, which is completely normal and desirable. Beneficial bacteria are consuming sugars and producing lactic acid, creating kimchi's distinctive tangy flavor and probiotic content.