 Pin It
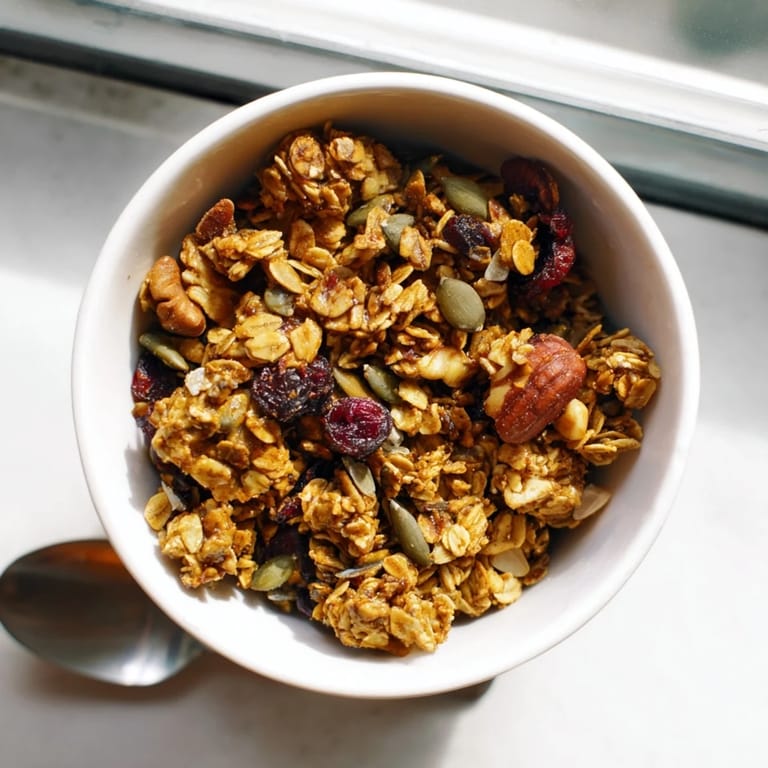
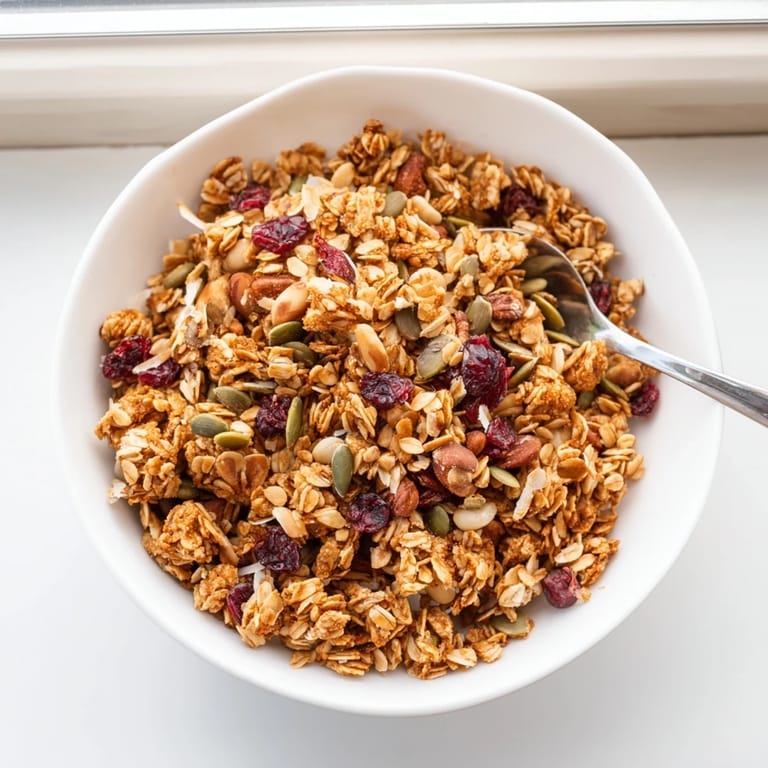
 The fragrance of toasting oats and nuts wafting through my kitchen on a chilly autumn morning changed my breakfast routine forever. I'd grown tired of store-bought granola with its excessive sweetness and mysterious ingredients. Standing at my counter, measuring honey as golden as the morning sunlight streaming through my window, I realized making granola clusters at home wasn't just economical—it was therapeutic.
Last winter during a weekend visit, my sister watched me make these clusters, skeptical that homemade could rival her expensive farmers market brand. The kitchen filled with nutty aromas as we chatted about childhood memories, and by the time she left with a mason jar full of golden clusters, she was already texting me from the train for the recipe. Her kids now call it the magic cereal.
Ingredients
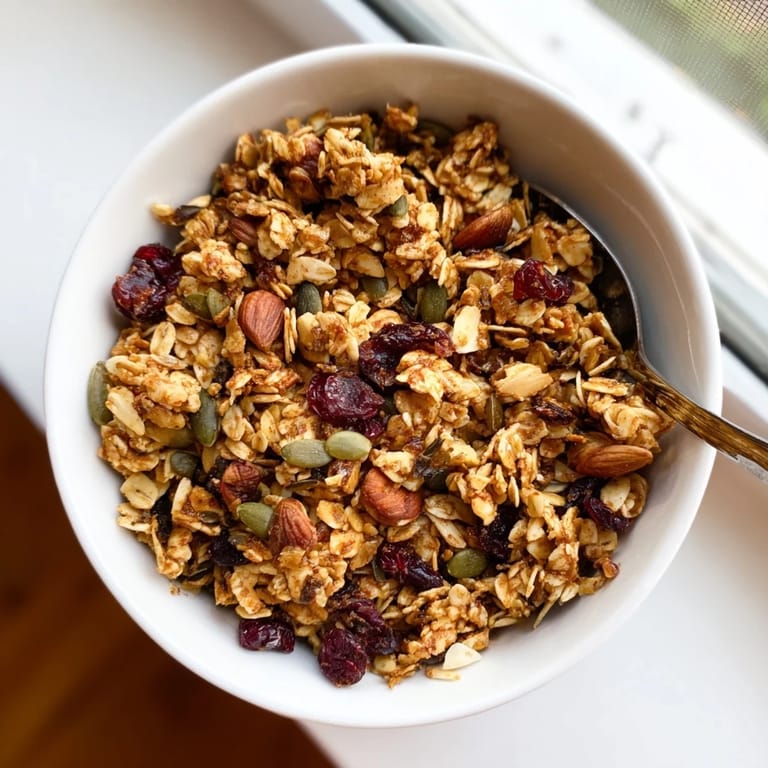
- Rolled oats: The foundation of great granola, old-fashioned oats create substantial clusters that hold together beautifully, while quick oats tend to crumble too easily.
- Mixed nuts: I learned from a pastry chef friend that roughly chopping nuts creates interesting texture variations, with some pieces toasting faster than others for complex flavor.
- Honey: Beyond sweetness, honey acts as the natural glue that binds your clusters, and darker varieties add subtle caramel notes I find irresistible.
- Coconut oil: After experimenting with various fats, coconut oil consistently produces the crispest texture while adding a subtle tropical undertone that complements the nuts.
- Vanilla extract: Just a teaspoon transforms basic ingredients into something that smells like a professional bakery, especially when it hits the warm oil.
Tired of Takeout? 🥡
Get 10 meals you can make faster than delivery arrives. Seriously.
One email. No spam. Unsubscribe anytime.
Instructions
- Prepare your base:
- Preheat your oven to 325°F and line your baking sheet with parchment paper, making sure it extends slightly up the sides to contain any bubbling honey.
- Mix the dry ingredients:
- In your largest bowl, combine the oats, chopped nuts, coconut if using, seeds, cinnamon and salt with a gentle hand. I like to use my fingers to break up any clumps of coconut or spices.
- Create your binding mixture:
- Whisk the honey, melted coconut oil, and vanilla until they form a smooth, amber-colored liquid that coats the back of a spoon. The warmth helps everything blend beautifully.
- Combine wet and dry:
- Pour the honey mixture over your oat mixture in a slow, steady stream while stirring. Keep folding until every oat looks glossy and slightly damp.
- Form your clusters:
- Spread the mixture onto your prepared baking sheet, then use the back of a spatula to press it down firmly into an even layer. This compression is the secret to creating those satisfying chunks rather than loose granola.
- Bake to golden perfection:
- Slide your tray into the oven and bake for 22-25 minutes, rotating halfway through for even coloring. Watch the edges carefully in the final minutes as they brown faster than the center.
- The patience phase:
- Here comes the hardest part—let the granola cool completely without touching it. This resting period is when the magic happens as the clusters set and become irresistibly crunchy.
- Break and store:
- Once cooled, use your hands to break the sheet into clusters of your desired size, then gently fold in any dried fruits or chocolate chips. Transfer to an airtight container while still slightly warm to preserve maximum freshness.
 Pin It
 On particularly hectic mornings, these clusters have become my sanity saver, eaten by the handful while rushing out the door. During one particularly chaotic week of deadlines, I survived almost entirely on these clusters sprinkled over yogurt, the simple act of preparing a batch the night before becoming an almost meditative break from stress. Something about the measuring, mixing and the predictable transformation in the oven restored a sense of control when everything else felt overwhelming.
Storage Secrets
The first time I made a double batch of these clusters, I discovered they maintained perfect crunchiness for nearly two weeks when stored in a glass container with a tight-fitting lid. Metal tins work well too, but plastic containers seem to trap moisture that compromises the texture. Placing a small piece of parchment at the bottom absorbs any residual moisture, extending freshness even in humid summer months when everything else in my pantry seems to wilt.
Seasonal Variations
Each season inspires different versions of this reliable recipe in my kitchen. Fall brings pumpkin spice and dried apple pieces, winter calls for orange zest and cranberries, spring welcomes lemon zest and dried blueberries, while summer means adding toasted coconut and dried mango. The base recipe remains unchanged while these seasonal additions keep breakfast interesting throughout the year, preventing the palate fatigue that comes from eating the same foods repeatedly.
Gifting Your Granola
After receiving countless compliments when bringing these clusters to brunches and playdates, Ive found they make perfect hostess gifts or thank-you presents that feel both personal and practical. The first time I gave a jar as a housewarming gift, tucked alongside a small bottle of local honey and a handwritten note with serving suggestions, my friend texted me a photo of her empty container within three days, begging for more.
- For gifting, layer the granola in clear glass jars with dried fruits arranged decoratively around the edges for visual appeal.
- Include a small tag with serving suggestions like sprinkling over ice cream or pressing into slightly softened coconut oil for an instant energy bar.
- If shipping to friends, double-bag in resealable plastic before placing in containers to maintain freshness during transit.
 Pin It
 Whether eaten straight from the container or artfully arranged over a breakfast bowl, these homemade granola clusters bring both nourishment and a moment of simple pleasure to everyday routines. They remind me that sometimes the most satisfying foods are the ones made with our own hands, customized to our exact preferences.
Recipe FAQs
- → How do I prevent my granola from becoming too hard?
Allow the granola to cool completely on the baking sheet without stirring. This helps clusters set properly without hardening excessively. Store in an airtight container to maintain crunchiness and prevent moisture absorption.
- → Can I make this vegan?
Yes, simply substitute maple syrup for honey. Ensure your coconut oil is vegan-certified, and check that your oats are certified gluten-free if that's a concern. All other ingredients are naturally plant-based.
- → What nuts work best for this preparation?
Almonds, pecans, and walnuts are excellent choices, but feel free to use your preferred nuts. Coarsely chop them for better texture variation. Avoid finely ground nuts, as they may not maintain their crunch.
- → How long does homemade granola stay fresh?
Store in an airtight container at room temperature for up to two weeks. For extended freshness, refrigerate for up to three weeks or freeze for up to three months. Ensure the granola is completely cooled before sealing containers.
- → Can I add dried fruit during baking?
No—add dried fruit after baking and cooling. Baking dried fruit can make it tough. Cranberries, raisins, and apricots work wonderfully mixed in after the granola has cooled completely.
- → What's the ideal oven temperature for even baking?
Bake at 325°F (160°C) and rotate the pan halfway through for even browning. This moderate temperature prevents burning while achieving the desired golden color and optimal crunch.