 Pin It
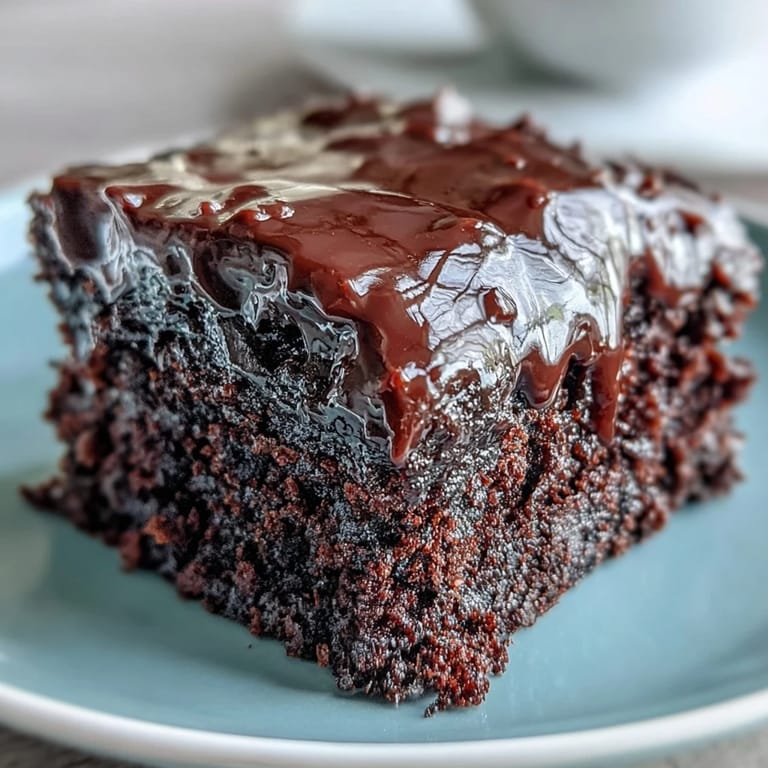
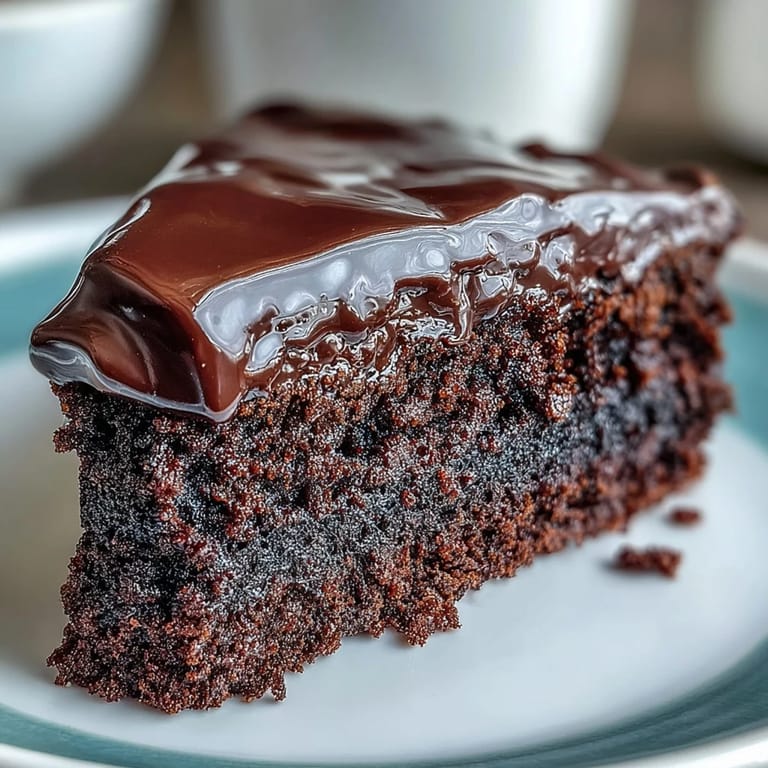
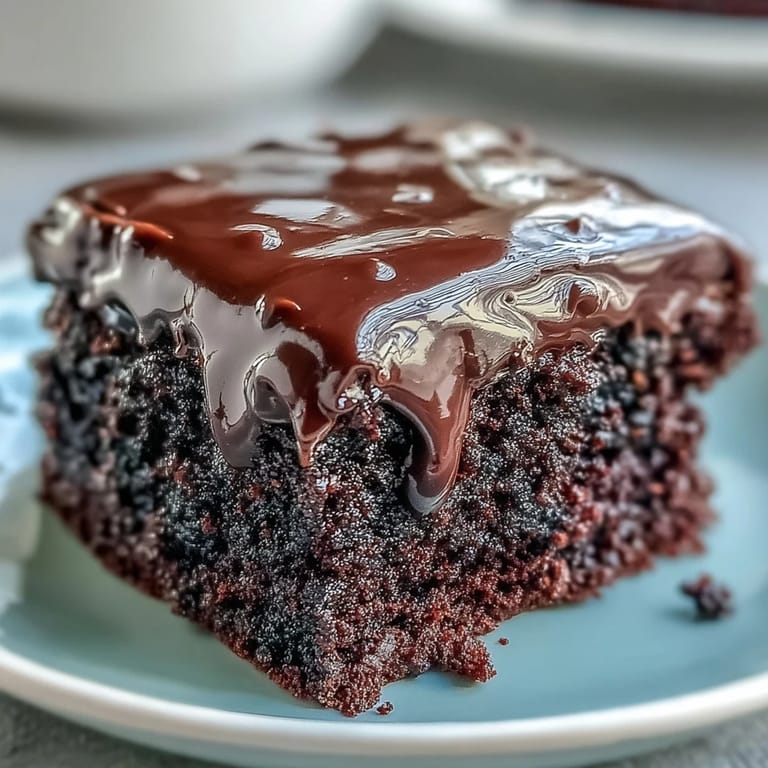
 The kitchen was warm, and I'd just pulled a tray of something forgettable from the oven when my neighbor knocked with a bar of dark chocolate she couldn't use. I didn't have plans, but that chocolate sat on the counter like a dare. An hour later, I had this squidgy, impossibly rich cake cooling on the rack, and the smell alone made me text three people to come over. Sometimes the best recipes start with no plan at all.
I made this for my friend's birthday once, and she cried a little when she cut into it. Not because it was beautiful, honestly it looked a bit lopsided, but because it tasted exactly like the cake her grandmother used to make in Wales. She said the smell brought her right back to that kitchen. I've never felt more proud of a slightly wonky cake in my life.
Ingredients
- Unsalted butter (200 g, plus extra): Use proper butter here, not spread or margarine, it makes the crumb tender and keeps the chocolate flavor pure.
- Dark chocolate (200 g, minimum 50% cocoa solids): I go for something around 60% because it balances richness without bitterness, and it melts like a dream.
- Light brown sugar (250 g): The molasses in brown sugar gives this cake a deeper, almost caramel note that white sugar just can't match.
- Large eggs (3): Room temperature eggs whisk up fluffier and blend more smoothly into the batter.
- Plain flour (200 g): All purpose flour works perfectly, just don't overwork it or the cake gets dense.
- Baking powder (1 ½ tsp): This gives just enough lift without making the cake airy, we want fudgy, not sponge.
- Fine sea salt (¼ tsp): A tiny pinch sharpens all the chocolate flavors and keeps the sweetness in check.
- Cocoa powder (50 g): Sift it well or you'll get little bitter pockets, I learned that the hard way.
- Whole milk (150 ml): Full fat milk makes the batter silky and keeps the crumb moist for days.
- Vanilla extract (1 tsp): Real vanilla, not the imitation stuff, it rounds out the chocolate beautifully.
- Dark chocolate for icing (150 g): Use the same quality as the cake, it becomes glossy and smooth when melted with butter.
- Unsalted butter for icing (100 g): This makes the icing spreadable and gives it a gorgeous sheen.
- Icing sugar (200 g, sifted): Sifting is non negotiable, lumpy icing is heartbreaking after all that work.
- Whole milk for icing (3 tbsp): Just enough to loosen the icing to spreading consistency without making it runny.
Tired of Takeout? 🥡
Get 10 meals you can make faster than delivery arrives. Seriously.
One email. No spam. Unsubscribe anytime.
Instructions
- Get the oven ready:
- Preheat your oven to 180°C (160°C fan) or 350°F, and grease two 20 cm round tins generously, then line the bottoms with baking paper. I always butter the paper too, just to be safe.
- Melt the chocolate and butter:
- Set a heatproof bowl over a pan of barely simmering water, add the butter and chopped chocolate, and stir now and then until it's completely smooth and glossy. Let it cool for a few minutes so it doesn't scramble the eggs later.
- Whisk the eggs and sugar:
- In a large bowl, whisk the sugar and eggs together with an electric whisk until the mixture is pale, thick, and leaves a ribbon trail when you lift the beaters. This takes about three to four minutes and it's worth every second.
- Combine the chocolate mixture:
- Pour the melted chocolate into the egg mixture and stir gently until it's all one color, then add the vanilla extract. The batter will look glossy and smell incredible.
- Sift the dry ingredients:
- In another bowl, sift together the flour, baking powder, salt, and cocoa powder. Sifting keeps everything light and prevents cocoa clumps.
- Fold everything together:
- Add the dry ingredients to the wet mixture in three parts, alternating with splashes of milk, and fold gently with a spatula until just combined. Don't overmix or the cake will be tough.
- Fill the tins:
- Divide the batter evenly between the two prepared tins and smooth the tops with the back of a spoon. Give each tin a gentle tap on the counter to release air bubbles.
- Bake until just set:
- Bake for 30 to 35 minutes, until a skewer inserted into the center comes out with a few moist crumbs, not wet batter. The tops should look set but still a bit soft in the middle.
- Cool the cakes:
- Let the cakes cool in the tins for 10 minutes, then turn them out onto a wire rack to cool completely. Rushing this step leads to broken cakes, trust me.
- Make the icing:
- Melt the chocolate and butter together over simmering water, then remove from the heat and beat in the sifted icing sugar and milk until the icing is smooth and glossy. It should be thick but spreadable.
- Assemble the cake:
- Place one cake layer on your serving plate, spread about a third of the icing on top, then add the second layer and cover the top and sides with the remaining icing. Use a palette knife to smooth it out, or leave it rustic and swirly.
 Pin It
 The first time I served this, someone asked if I'd trained as a pastry chef. I laughed and said no, I just followed the recipe and didn't panic. But honestly, that moment made me realize that a really good chocolate cake can make you feel like a kitchen wizard, even when you're just winging it with butter and cocoa powder.
How to Store and Serve
This cake keeps beautifully in an airtight container at room temperature for up to three days, and somehow it gets even fudgier on day two. If you want to make it ahead, bake the layers, wrap them tightly in cling film, and freeze them for up to a month, then thaw and ice them the day you need them. I like serving it with a dollop of whipped cream or fresh raspberries on the side, the tartness cuts through the richness perfectly.
Make It Your Own
If you want to add a layer of raspberry jam between the cakes, go for it, the fruity sharpness is gorgeous against all that chocolate. I've also stirred a tablespoon of espresso powder into the batter before, and it deepened the chocolate flavor without making it taste like coffee. You could fold in some chopped toasted hazelnuts or swirl in some salted caramel, this cake is forgiving and takes to variations beautifully.
What You'll Need
You'll need two 20 cm round cake tins, a couple of mixing bowls, and either an electric whisk or a good strong arm for whisking by hand. A heatproof bowl and a saucepan for melting the chocolate are essential, and a palette knife or offset spatula makes icing the cake so much easier. Don't skip the wire rack for cooling, it stops the bottoms from getting soggy.
- Make sure your tins are the same size so the layers stack evenly.
- If you don't have baking paper, a light dusting of flour over the butter works in a pinch.
- A cake turntable isn't necessary, but it makes icing feel like you're on a baking show.
 Pin It
 There's something deeply satisfying about pulling a homemade chocolate cake out of the oven and knowing it's going to make people happy. This one does that every single time.
Recipe FAQs
- → Can I use milk chocolate instead of dark chocolate?
Yes, you can use milk chocolate, but the cake will be sweeter and less rich. Dark chocolate with at least 50% cocoa solids provides the best depth of flavor and squidgy texture.
- → How do I know when the cake is done?
Insert a skewer into the center of the cake. It should come out with a few moist crumbs but not wet batter. This ensures a fudgy texture without being undercooked.
- → Can I make this cake in advance?
Absolutely. The cake keeps well in an airtight container for up to 3 days. You can also freeze the unfrosted layers for up to 2 months and ice them when needed.
- → What can I add between the cake layers?
For extra indulgence, try a layer of raspberry jam, chocolate ganache, or whipped cream. The tartness of raspberry jam works particularly well with the rich chocolate.
- → Why is my icing too runny?
The icing needs to cool slightly before spreading. If it's too runny, refrigerate it for 10-15 minutes, stirring occasionally until it reaches a spreadable consistency.
- → Can I make this as a single layer cake?
Yes, use a 23 cm (9-inch) round tin and bake for 40-45 minutes. You'll have a thicker single layer cake that's just as delicious with the chocolate icing on top.