 Pin It
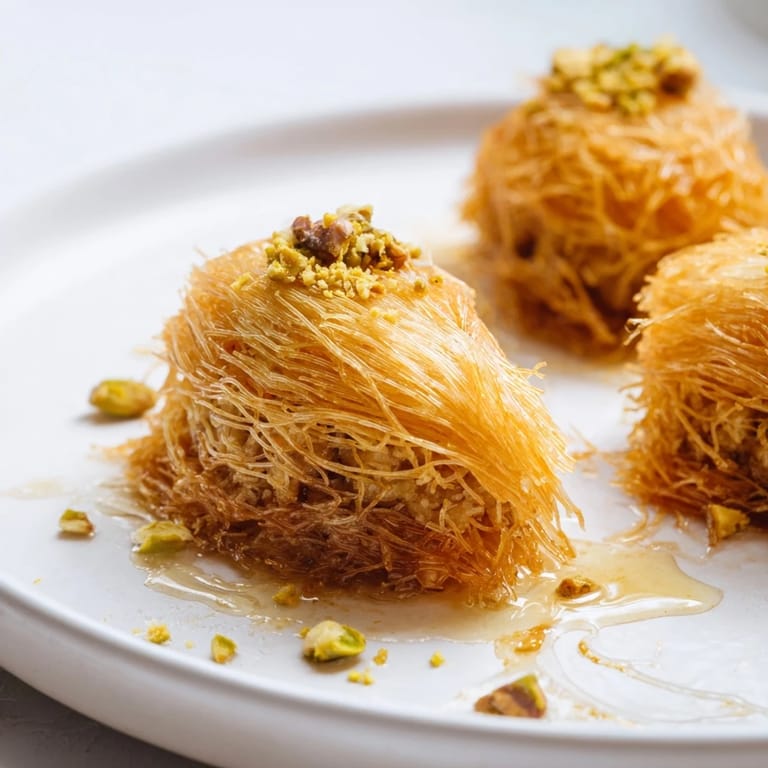
 My grandmother used to make konafa on Friday afternoons, and the sound of her fingers separating those delicate kataifi strands became the soundtrack of my childhood. There's something almost meditative about watching the pastry transform from a tangled nest into something you can actually work with, layer by layer. The first time I attempted it myself, I was terrified of tearing the dough, but she just laughed and said the imperfections would disappear once the butter hit it. Now whenever I make konafa, that kitchen fills with the same buttery warmth, and suddenly I'm twelve again, stealing pistachio pieces from the filling bowl.
I made this for my best friend's engagement party last spring, and watching her close her eyes after that first bite made everything worth it. She'd just moved to Cairo for her job and was homesick, so I wanted to give her that taste of her mother's kitchen. The whole dessert was gone by the end of the night, and people were still talking about it weeks later.
Ingredients
- Kataifi (shredded phyllo dough), 500 g: Make sure it's thawed completely, or the strands will snap when you try to separate them; I learned that the hard way.
- Unsalted butter, 200 g melted: The butter is what makes the layers shatter when you bite into them, so don't skimp or substitute with oil.
- Walnuts, 150 g finely chopped: These should be chopped fine enough to distribute evenly but still have some texture.
- Pistachios, 100 g finely chopped: The green flecks add color and a slightly sweet, earthy flavor that balances the cinnamon beautifully.
- Almonds, 50 g finely chopped: They add body and a gentle sweetness without overpowering the other nuts.
- Granulated sugar (nut filling), 60 g: This sweetens the filling without making it cloying, letting the warm spices shine.
- Ground cinnamon, 1 tsp: The cinnamon is what makes people ask what's in it, so measure it accurately.
- Ground cardamom, 1/4 tsp: Just a whisper of cardamom adds an almost floral note that elevates the whole thing.
- Granulated sugar (syrup), 200 g: This creates the light, clear syrup that soaks into the hot pastry.
- Water, 120 ml: This ratio of sugar to water creates the perfect consistency for soaking without pooling.
- Honey, 2 tbsp: The honey adds depth and a subtle floral note to the syrup.
- Lemon juice, 1 tsp: A squeeze of lemon cuts through the sweetness and adds brightness.
- Rose water or orange blossom water, 1 tsp (optional): If you use this, go slowly, as it's potent and can overpower the delicate flavors.
Tired of Takeout? 🥡
Get 10 meals you can make faster than delivery arrives. Seriously.
One email. No spam. Unsubscribe anytime.
Instructions
- Prepare your workspace and heat the oven:
- Preheat your oven to 180°C and grease that 23 cm round pan with a light brush of melted butter so the bottom doesn't stick. This is your moment to get calm and ready, because kataifi needs a gentle touch.
- Gently separate the kataifi strands:
- Take the thawed kataifi and use your fingers to loosen and separate the strands, working slowly so they don't tear. It should look like a nest again, loose and ready to layer.
- Create the base layer:
- Press about half the kataifi into the prepared pan, patting it down gently to form an even base layer. Drizzle half the melted butter evenly over it, letting it seep down through the strands.
- Mix and spread the nut filling:
- Combine walnuts, pistachios, almonds, sugar, cinnamon, and cardamom in a bowl, mixing until the spices are evenly distributed throughout the nuts. Spread this mixture evenly over the buttered kataifi layer, leaving just a small border around the edge.
- Add the top layer:
- Carefully place the remaining kataifi over the nut filling, pressing gently so it holds together. Pour the rest of the melted butter over the top, using a brush to make sure every bit gets coverage for even browning.
- Bake until golden and crisp:
- Slide the pan into the oven and bake for 30 to 35 minutes, keeping an eye on it toward the end so it turns a beautiful deep golden color without burning.
- Make the honey syrup while it bakes:
- In a saucepan, combine sugar and water, then bring to a boil and let it simmer for 7 to 8 minutes until slightly thickened. Remove from heat and stir in honey, lemon juice, and floral water if using, then set it aside to cool just a little.
- The crucial pour:
- The moment the konafa comes out of the oven, while it's still hot, slowly and evenly pour the warm syrup over the entire surface. You'll hear a gentle hiss, and the pastry will absorb the sweetness like it's been waiting for this moment.
- Cool and slice:
- Let it sit for about 30 minutes so the layers set and the syrup fully absorbs. Cut into diamonds or squares with a sharp knife, and serve at room temperature when it's reached that perfect balance of crispy and tender.
 Pin It
 One winter evening, my neighbor knocked on my door with a plate of konafa because she'd seen me struggling to move furniture into my new place. I hadn't had anything warm all day, and I remember sitting on boxes in my empty kitchen, eating piece after piece while watching snow fall outside the window. It was the first moment I really felt like the move was going to be okay.
Building Flavor Layers
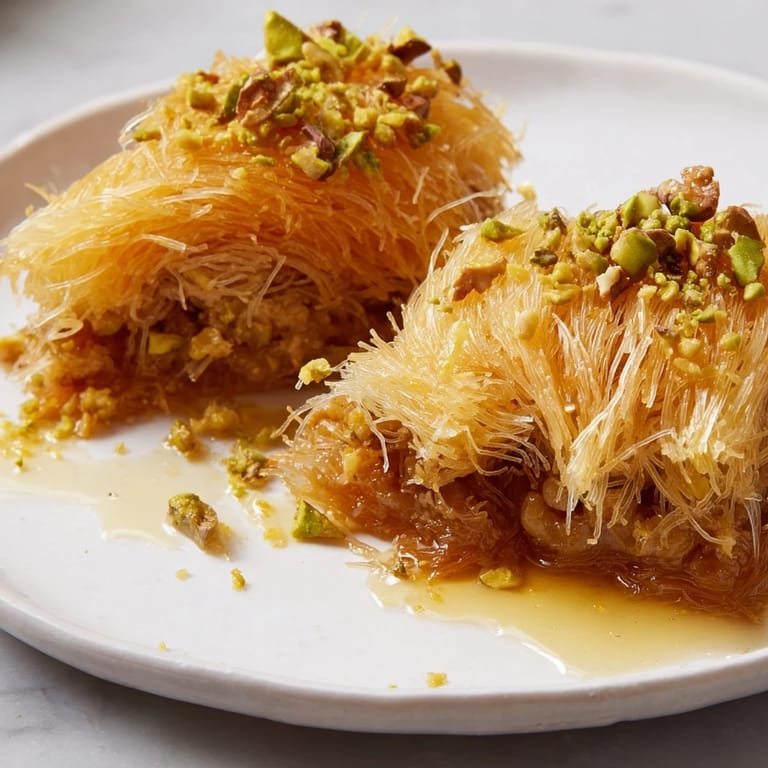
The beauty of konafa is in how each element plays a different role, like musicians in an orchestra. The crispy, butter-soaked pastry provides texture and carries the richness, while the nut filling gives you warmth and depth from the cinnamon and cardamom. The honey syrup ties everything together with sweetness and a subtle floral note, but it's the lemon juice that keeps it all from becoming cloying. When you bite into a piece, you should taste the distinct flavors first, then feel them blend together on your tongue.
The Science of Crispy Layers
Kataifi gets its signature crisp texture from the combination of thin strands and butter, which creates thousands of tiny pockets that brown and crackle when heated. The key is making sure the butter penetrates all the layers, not just sitting on top, so you end up with even browning and consistent texture throughout. When you pour the hot syrup over the hot pastry, the moisture is absorbed into these pockets, softening the interior while keeping the outside crisp, creating that perfect contrast that makes konafa so special.
Serving and Storage Tips
Konafa is best enjoyed the same day it's made when the contrast between crispy and tender is most pronounced, though it keeps well in an airtight container for up to three days. You can eat it at room temperature, but some people prefer to warm it gently in a low oven before serving, which brings back some of that fresh-from-the-pan magic. It pairs beautifully with strong coffee, sweet mint tea, or even a dollop of thick clotted cream for richness.
- Store leftovers in an airtight container to keep the layers as crisp as possible.
- If it softens, a brief spell in a 150°C oven will restore some of the crispness.
- You can make the components ahead, but assemble and bake it fresh for the best results.
 Pin It
 Every time I make konafa, I'm reminded that the best dishes are the ones that connect us to people we love, whether it's a memory from childhood or a moment of comfort on a difficult day. This one deserves a place in your kitchen.
Recipe FAQs
- → What type of dough is used in konafa?
Kataifi, shredded phyllo dough, forms the crispy layers that are essential for konafa’s texture.
- → How can I ensure the konafa is crispy?
Evenly coating the kataifi strands with melted butter and baking until golden ensures a crisp, flaky finish.
- → What nuts are traditionally used in this dish?
Walnuts, pistachios, and almonds provide the spiced, crunchy filling in the layers.
- → How is the syrup flavored?
The honey syrup is enriched with lemon juice and optionally rose or orange blossom water for aromatic depth.
- → Can I customize the nut filling?
Yes, alternatives like hazelnuts, cashews, or pecans can be used depending on preference.
- → What is a suggested serving tip?
Serve cooled with fresh berries or a dollop of whipped cream to enhance the flavors and textures.