 Pin It
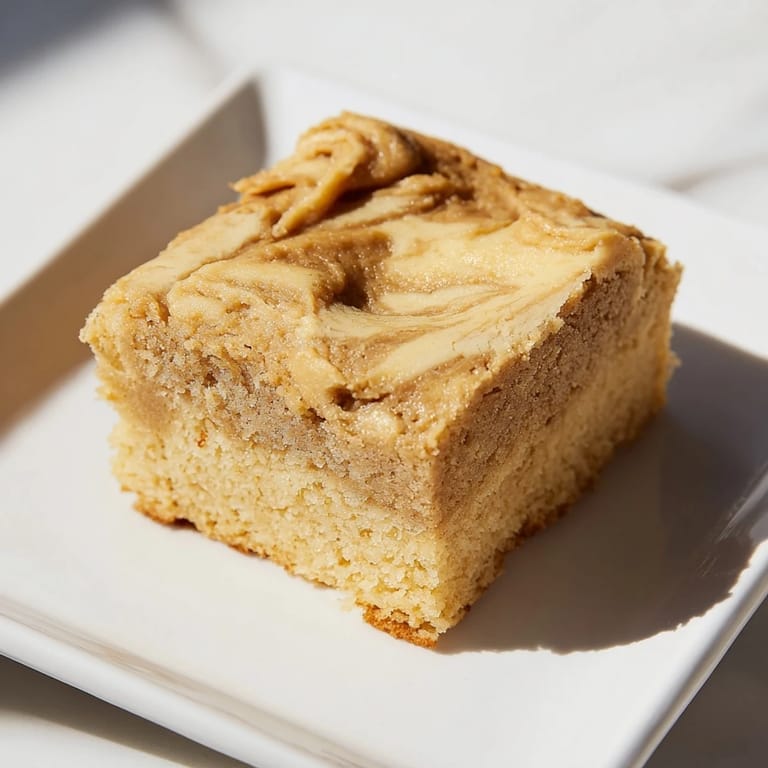
 I stumbled onto mochi cake during a potluck where someone brought a butter mochi that disappeared in minutes. The chewy, almost custardy texture stuck with me for weeks until I finally tracked down a bag of mochiko and started experimenting. One afternoon, while stirring peanut butter into my usual batter, I realized I'd accidentally created something that tasted like childhood and novelty at the same time. The kitchen smelled like toasted rice and roasted peanuts, and I couldn't stop cutting tiny slivers to taste until half the pan was gone.
The first time I made this for a small gathering, I wasn't sure anyone would understand what mochi cake even was. But after the first cautious bite, the room went quiet in that good way where people stop talking and just eat. Someone asked if it was a brownie, someone else thought it might be flan, and I just smiled because it's neither and both. By the end of the night, I was texting myself the recipe so I wouldn't forget the exact ratio of peanut butter to butter.
Ingredients
- Sweet rice flour: This is mochiko, the magic behind the chew, and using regular rice flour will give you a completely different texture, so double check the label.
- Granulated sugar: It dissolves into the batter and keeps the cake tender without making it too sweet or heavy.
- Baking powder: Just a little lift to keep the texture from becoming too dense, though it will still be wonderfully chewy.
- Salt: Balances the sweetness and makes the peanut butter flavor come forward instead of hiding in the background.
- Whole milk: Adds richness and helps create that custardy center that makes mochi cake so satisfying.
- Coconut milk: Use the full fat kind from a can, it brings a subtle tropical note that plays beautifully with peanut butter.
- Eggs: They bind everything together and give the cake structure without making it cakey in the traditional sense.
- Creamy peanut butter: The star of the show, make sure it's well stirred so the oil is evenly mixed in before you measure it out.
- Unsalted butter: Melted and still warm, it blends into the batter smoothly and adds a buttery depth that coconut milk alone can't achieve.
- Vanilla extract: Just enough to round out the flavors and make the whole thing smell like a hug.
Tired of Takeout? 🥡
Get 10 meals you can make faster than delivery arrives. Seriously.
One email. No spam. Unsubscribe anytime.
Instructions
- Prep the pan:
- Preheat your oven to 350°F and grease your 9x13 inch pan generously, or line it with parchment so you can lift the whole cake out later. I like to leave a little overhang on the sides for easy removal.
- Mix the dry ingredients:
- Whisk together the mochiko, sugar, baking powder, and salt in a large bowl until there are no lumps and everything looks evenly distributed. This step is quick but important for a smooth batter.
- Combine the wet ingredients:
- In another bowl, whisk the milk, coconut milk, eggs, peanut butter, melted butter, and vanilla until the mixture is completely smooth and the peanut butter is fully incorporated. If the peanut butter is stubborn, whisk a little harder or warm it slightly before adding.
- Bring it all together:
- Pour the wet mixture into the dry ingredients and whisk until the batter is silky and lump free, it should look like a thick pancake batter. Don't overmix, just get it smooth.
- Pour and settle:
- Pour the batter into your prepared pan and tap it gently on the counter a few times to release any trapped air bubbles. This helps the top bake evenly.
- Bake until golden:
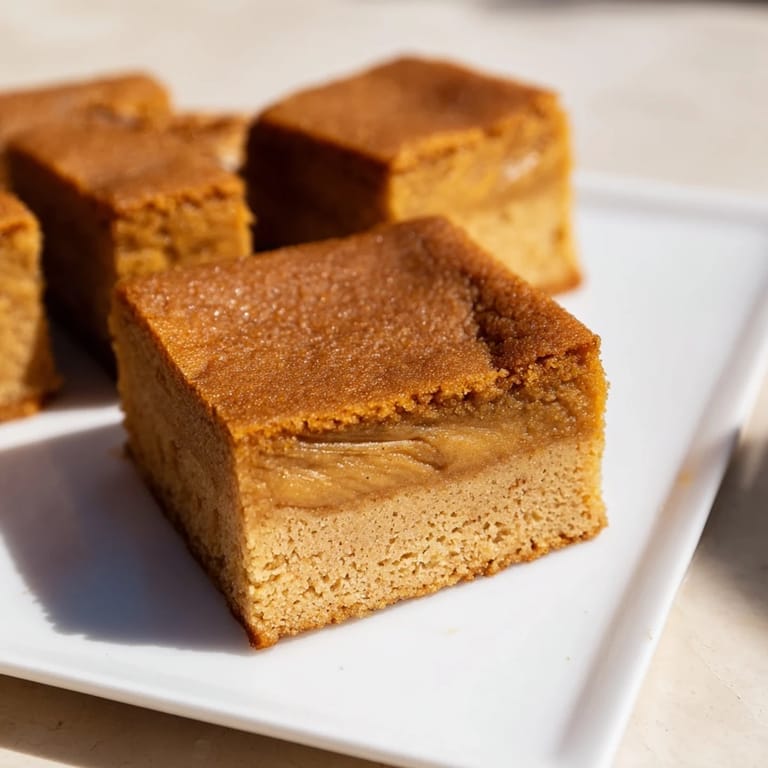
- Slide the pan into the oven and bake for 45 to 50 minutes, until the top is golden brown and a toothpick inserted in the center comes out clean or with just a few moist crumbs. The edges might puff up slightly and that's perfectly fine.
- Cool completely:
- Let the cake cool all the way down in the pan before you try to slice it, patience here is rewarded with clean cuts and the right texture. I usually wait at least an hour.
- Slice and serve:
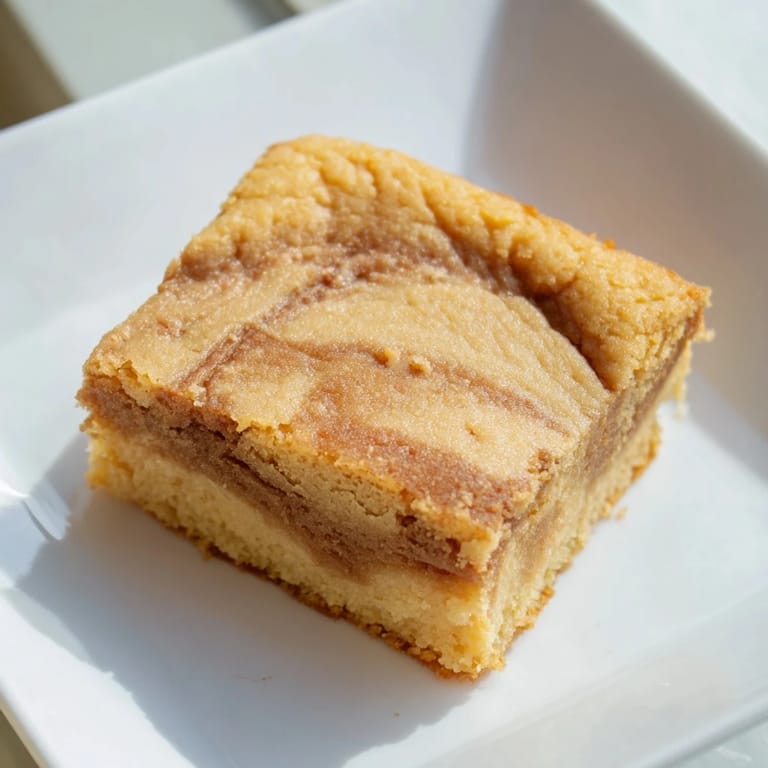
- Cut into squares and serve at room temperature or straight from the fridge. Both ways are delicious, cold gives you a firmer chew and room temp is softer and more custardy.
 Pin It
 One Sunday morning, I reheated a slice of this cake in the microwave for about ten seconds and it turned soft and warm, almost like it had just come out of the oven. I ate it with a cup of black coffee and realized that some recipes don't need fancy plating or garnishes to feel special. Sometimes it's just about that perfect chew and the way peanut butter tastes when it's baked into something unexpectedly tender.
Storage and Make Ahead
This cake keeps beautifully in an airtight container in the fridge for up to five days, and honestly it gets even chewier and more flavorful as it sits. You can also freeze individual squares wrapped in plastic wrap and then tucked into a freezer bag, they thaw quickly on the counter or in the microwave. I've pulled a square out of the freezer on a weeknight and had dessert ready in two minutes.
Variations and Swaps
If you're not a peanut butter person, try almond butter or cashew butter for a different nutty flavor that still works with the mochi base. You can also fold in chocolate chips, chopped peanuts, or even a swirl of jam before baking for a fun twist. I once added a handful of mini chocolate chips and it turned into something that tasted like a peanut butter cup in cake form.
Serving Suggestions
This cake is wonderful on its own, but it's also great with a dollop of whipped cream, a scoop of vanilla ice cream, or fresh berries on the side. I've served it warm with a drizzle of honey and it was gone in minutes. Sometimes I'll dust the top with a tiny bit of powdered sugar just to make it look a little fancy, even though it doesn't need it.
- Warm it up for a few seconds in the microwave to bring back that fresh baked softness.
- Pair it with hot tea or cold milk for a simple, satisfying snack.
- Cut into smaller pieces for a potluck or party, they're easier to grab and people love bite sized treats.
 Pin It
 Every time I make this, I'm reminded that the best recipes are the ones that feel like a happy accident. This cake is proof that you don't need to choose between chewy and tender, or between familiar and new.
Recipe FAQs
- → What type of flour is best for this dish?
Glutinous rice flour, often called mochiko, is crucial for achieving the chewy texture characteristic of this dessert.
- → Can I substitute the coconut milk?
Yes, evaporated milk can be used instead of coconut milk for a lighter, less tropical flavor.
- → How do I know when it’s fully baked?
The top should be golden brown, and a toothpick inserted in the center should come out clean.
- → Are there any allergen concerns?
This dish contains peanuts, eggs, milk, and coconut, so it's not suitable for those with these allergies.
- → What’s a good way to add texture?
Sprinkling roasted peanuts on top before baking adds a satisfying nutty crunch.
- → How should leftovers be stored?
Store leftovers in an airtight container in the refrigerator; they keep well and can be enjoyed chilled or at room temperature.